How to Replace a Motherboard of a Desktop Computer
Are you wondering about replacing the computer motherboard by yourself? Do you want to know how to upgrade motherboard? Well, as with any big task, this one can be overwhelming. Here we are to inform you: how to replace a motherboard on your computer. Just follow these simple steps, and you can efficiently complete replacing a motherboard.
Step 1: Turn Off and Unplug the Power Source
Before starting any work on your computer, turn off and unplug the power source. It should be safe to touch all parts of the computer now, as long as it is not plugged in. Also, you should be aware of the exposed wires. And also, you should keep yourself away from the touch of other electric currents.
Step 2: Ground Yourself to Prevent Electric Shock
Electrical components store a charge even when they are not in use. It happens, especially true with computers. Computers are often plugged in and turned on even when not running.
It will help if you ground yourself to prevent electric shock. Also, you can use a wrist strap or anti-static mat if you can manage. Otherwise, try touching metal on your body before handling any electronic components.
Step 3: Disassemble the Case to Get to the Motherboard
After grounding yourself, remove all the screws from the case. Then, separate two halves from the casing. Depending on your computer construction, you may need a screwdriver for this procedure.
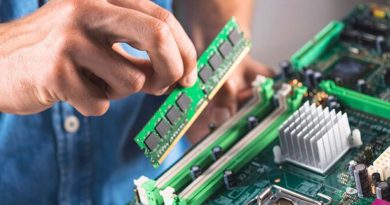
Step 4: Remove the Old Motherboard from Inside the Case
Remove all the screws that hold the old motherboard in place. Some motherboards may have a few more screws than others. But most have at least 10 to 15 screws holding them in place.
Once removing all the screws, lift one end of the board. And then set it aside with its hardware attached.
Step 5: Install a New Motherboard into the Computer Case
After removing the old motherboard from inside the case, it is time to install a new one. Make sure you properly mount it onto the standoffs. Then, place your motherboard on top of your case. Align it with the holes in the motherboard tray. Secure it with screws in each corner of the backplate that came with your case.
Step 6: Install and Connect Everything Else
Next, reconnect all the cables from your old motherboard to the new one. You might have to remove some cables from their connectors on the back of your old motherboard. And then plug them into the corresponding connectors on your new one. There may be extra cables that do not go anywhere. Leave those cables unconnected for now.
Step 7: Close Up and Reconfigure the Cables.
Finally, close up the case. Reconfigure all your cables. Plug in your power cord, keyboard, and mouse. Then turn on your computer.
Things to Consider to Replace a Desktop Computer Motherboard
You should consider a few things when replacing a desktop computer motherboard. Here’s a comprehensive list of motherboard replacements to ensure your desktop performance:
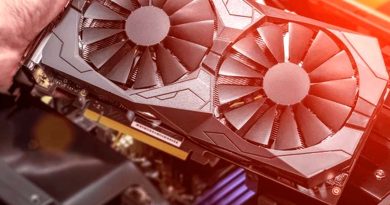
Form Factor: The common factors such as ATX, Micro-ATX, and Mini-ITX must match the motherboards. So, you need to ensure switching motherboards that match your case.
CPU Compatibility: Different processors need different types of motherboards. So, you need to check the CPU model compatibility with the motherboard.
Socket Type: Every processor needs specific sockets to fit on it. So, check the CPU socket of the motherboard that should match your existing processor.
RAM Compatibility: Desktop RAM types, such as DDR3, DDR4, or DDR5, are different. Also, they have different types of specifications and speeds. So, check the memory compatibility with the motherboard and then replace it.
Chipset: Desktop motherboards come with various types of chipsets and capabilities. So, make sure that the motherboard chipset supports your existing specifications.
Storage: Some desktops have hard disk drives, and others have solid-state storage drives. So, ensure that the new motherboard has the required SSD or HDD installation features.
Connectivity: Consider the availability of audio jacks, USB, and Ethernet ports for connectivity on the motherboard.
Expansion Slots: Check the motherboard with all the required expansion slots. A graphics card slot, PCIe slot, and sound card slot are essential for a motherboard.
Power Delivery: You should check the power delivery system of the motherboard that you want to purchase. Otherwise, your CPU and other components can not run well or may be damaged.
Brand: Choosing a renowned brand motherboard is essential to get reliable performance. You can read users’ feedback and reviews to determine which brand motherboard is better.
Budget and Warranty: Consider a good budget to replace a motherboard. Also, consider warranty and customer support options when choosing a motherboard.
FAQs
How to Replace a Motherboard without Reinstalling Windows?
If you want to replace your motherboard but do not want to reinstall Windows, you can use a USB flash drive to reset the computer and restore it to factory settings. This process is useful if you want to get rid of your personal data.
Will I lose my files if I replace my motherboard?
The short answer is no. When you replace a motherboard of a desktop, the data on your hard drive will remain intact. If you use an external hard drive or USB flash drive, you may need to copy over any files before reinstalling Windows.
What to do after installing new motherboard?
After installing a new motherboard, check all cables and connections. Make sure all connections are connected with their appropriate ports and sockets. Then, you must close the chassis and press the power button for the final checkup.
The above details are about how to replace a motherboard. If you want to know more about how to replace a desktop hard drive, click here for another article.