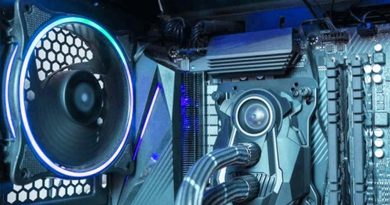
How to Install RAM into a Desktop Computer
Installing the RAM into a computer can seem overwhelming if you have never done it before. So, you need to know about your system configuration with RAM compatibility. Then you can install another RAM in computer.
Also, it will give you an easier, less stressful transition to these incredible upgrades. Let’s learn more about how to install RAM into a desktop computer. The following is a step-by-step guide to the installation of RAM into your computer.
Step 1: Shut Down the Computer and Unplug the Power
First, you must turn off your computer by pressing the power button. Also, you can shut down by using the operating shutdown option on the operating system.
These steps will ensure no data loss from the hard drive. Unplugging the power cable will also prevent electrical damage as you touch something while working on your PC.
Step 2: Remove Both Sides of the Panel of the System Case
Next, you need to remove all the screws from the case first of your desktop. You can use a screwdriver to remove the side panel.
Also, you must remove any plastic clips holding in place panels like those covering memory slots. Be careful to take off the panes to avoid any damage or breaks.
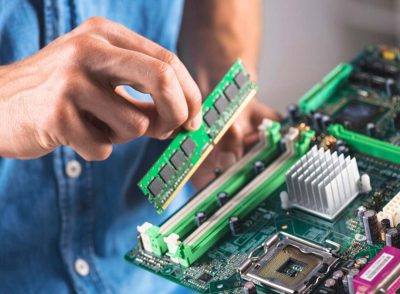
Step 3: Select an Empty Slot from the Motherboard
Once you have removed all necessary panels from your computer, look for an empty slot on your motherboard. Depending on the model, you will find many slots for RAM.
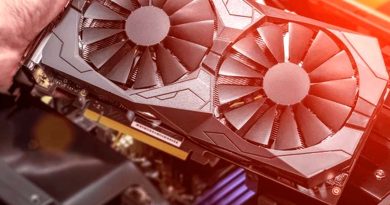
The slots will be near other components like graphics cards. So, make sure not to install RAM into slots already occupied with other components!
Step 4: Slide the New RAM Chip into the Slot
Once you find where to put each chip, align it and slide it into place. The CPU will have a lever or arm. That needs to flip up before sliding the chip in.
So, flip it up and then slide the chip in. You should hear a click when it sits. If not, try again until you hear the click. Or try until you feel resistance from the chip trying to push in further.
Step 5: Replace the Metal Clamp on Motherboard
After replacing the metal clamp, tighten it until it is secure. Now that you have got your RAM installed.
But, before working on the computer, you need to check the status of the new RAM. You must follow the final step to check and ensure everything is alright.
Step 6: Turn On Your computer and Look to See RAM Detection
Here, we are in the final step of turning off the computer. After turning on the computer, you will see the information on your installed RAM.
Here, you can understand the number of RAMs detected in your system. You must see some sign that the RAM recognizes your system.
The above steps will teach you how to install RAM into a desktop computer. Hopefully, this guide has helped you to add more RAM to your computer. The process should be easy, whether you are a Windows or Mac user. However, different operating systems will have additional instructions.
How to Install RAM on Laptop
When you want to install RAM on your laptop, you must want to enhance the performance. If you do the task of installing the RAM by yourself, you should follow our guide. Here, we have delivered the steps of how to install RAM on laptop to the next:
Step 1: Prepare your Laptop
First, you must prepare your laptop to install the RAM. So, you need to turn off your laptop completely and unplug it from any power outlets. Also, choose a plain and stable surface to complete the task.
Step 2: Ground Yourself
Before the laptop or touching any internal parts, you should ground yourself. You can touch something metal or wear an anti-static strap to discharge any static electricity from your body.
Step 3: Locate the RAM Slots
Then, you need to locate the slots to install the new RAM. Most laptops have the cover on the bottom tightened with a few screws. So, you need to unscrew and remove the cover to access the RAM slots.
Step 4: Insert the RAM
When you access the RAM slots inside the laptop, insert the new RAM into an empty slot. Then, push the RAM module down gently and ensure the placement by hearing a click.
Step 5: Secure the Bottom Cover
After checking the proper placement of the RAM into the slot, uncover it. Then, get back all the screws and secure all of them gently.
Step 6: Turn on your laptop
Finally, turn on your laptop to check installing the RAM is working correctly. Your laptop should boot up normally, and the RAM should start working correctly. You can go to your laptop’s settings to check the new RAM performance.
By following the above, you can complete the process of installing the RAM on your laptop. Thus, you can improve your laptop’s performance to run multiple programs or demanding tasks.
FAQs
Which slots to install RAM?
Typically, four slots are available on a desktop motherboard. But you can only use two of them at any given time. The other two reserved slots are for your graphics card and sound card.
If you use an all-in-one desktop computer with no separate case or tower, four slots will likely be on the motherboard. And you will have to decide which two slots to use for RAM.
You should place the RAM furthest from others to get a safe result. But if a graphics card already takes up one of those slots, choose another pair. Those pairs are far apart from each other and free of additional hardware.
How do I activate RAM slots?
The BIOS of the computer motherboard activates RAM slots. Also, the BIOS provides information when you turn on a computer. Besides, it determines all the device interactions with each other.
The first step in activating RAM slots is locating your computer’s BIOS setting. The exact location of the setting is different for every system. However, it usually appears under Power management, Advanced settings, or System information.
What should you do after adding RAM to the PC?
After you have added RAM to your PC, you will need to restart your computer. This is because the Operating System has not yet properly initialized the new memory.
When the computer starts running, you need to open the Task Manager. In the task manager, you need to check out the Performance tab. You should see that your computer has more memory than it did before!
Throughout this article, you have discovered how to install RAM on desktops and laptops. If you want to know how to change Canon printer ink, click here for more solutions.